
How to Unscrew Broken Screw: Expert Tips and Tricks
Removing a broken screw can feel like an impossible task. It’s frustrating when a project comes to a halt because of this issue.
But don’t worry—there are practical ways to get the job done without damaging your tools or materials. A broken screw often happens due to over-tightening or rust. It can ruin the flow of your work, leaving you stuck. Knowing how to unscrew it properly saves time and effort.
Whether it’s lodged in wood, metal, or plastic, the right technique makes all the difference. In this guide, you’ll learn simple, effective methods to unscrew a broken screw. These tips are beginner-friendly and easy to follow, so you can fix the problem and move forward with your project.
Common Causes Of Broken Screws
Broken screws can be frustrating to deal with. Understanding why screws break can help prevent future issues. The most common causes are related to user error or material quality. Let’s explore these reasons in detail.
Overtightening Issues
Overtightening is a leading cause of broken screws. When too much force is applied, the screw’s structure weakens. The threads can strip, or the head may snap off. This happens often with power tools, where control is harder to maintain. Using the wrong torque settings can also increase this risk.
Another issue is using a screwdriver that doesn’t fit properly. A mismatched tool can slip and damage the screw head. This makes removal harder and increases the chance of breakage.
Material Weakness
Not all screws are made from strong materials. Cheap screws often use low-quality metals. These are more prone to bending, snapping, or cracking under pressure. Even screws made of brittle alloys can break with little force.
Rust and corrosion also weaken screws over time. Environmental factors like moisture accelerate this process. Screws in outdoor or humid areas are especially vulnerable. Always check the material type and quality before use.
Essential Tools For Screw Removal
Removing a broken screw can be a tricky task. With the right tools, you can simplify the process and avoid further damage. Having the right equipment on hand is crucial for success. Below, we’ll explore the essential tools you need for effective screw removal.
Manual Tools To Keep Handy
Manual tools are often the first choice for screw removal. A screwdriver set with various heads is essential. Flathead and Phillips screwdrivers work for most screws. Use a smaller size to grip stripped screws better.
Pliers are another must-have. Needle-nose pliers can grip the screw tightly. Locking pliers provide extra holding power for stubborn screws.
An awl or center punch is also helpful. It creates a small notch on the screw head. This gives your tools a better grip.
Power Tools For Tough Jobs
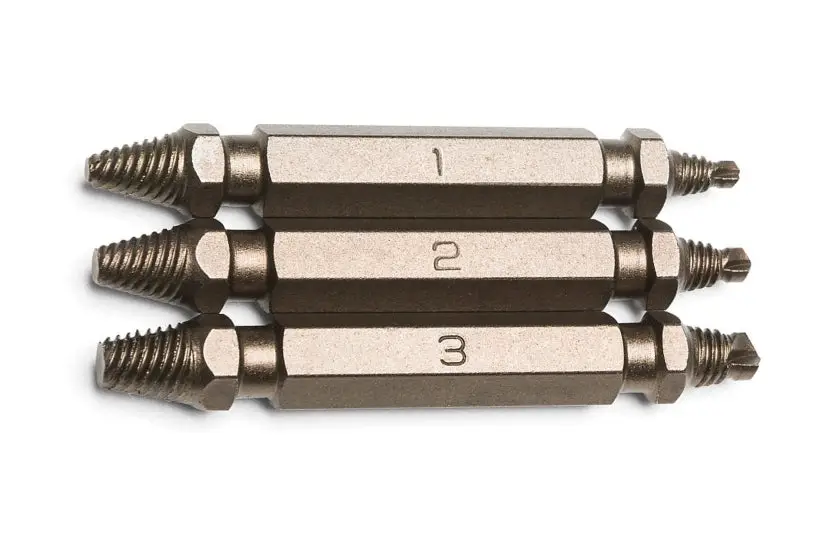
Power tools are ideal for difficult or deeply embedded screws. A power drill with a screw extractor bit is highly effective. The extractor bit bites into the screw, making removal easier.
An impact driver is another excellent option. It delivers rotational force to loosen stubborn screws. This tool works well for screws stuck due to rust or over-tightening.
A rotary tool with a cutting disc can also be useful. It allows you to cut a new groove into the screw head. This creates a fresh surface for your screwdriver to grip.
Preparation Before Removal
Encountering a broken screw can be frustrating, but jumping into removal without proper preparation can make things worse. Taking a few moments to set up can save you time and effort. Let’s break this down into manageable steps.
Assessing The Damage
Start by closely examining the screw and the material it’s stuck in. Is the screw completely snapped, or is part of the head still intact? This will determine the tools and technique you’ll need.
If the head is stripped but still visible, you may be able to grip it with pliers. If it’s snapped below the surface, you’ll likely need a screw extractor. Knowing the type of damage helps you avoid unnecessary trial and error.
Ask yourself: Is the surrounding material fragile? If you’re dealing with delicate wood or plastic, you’ll need to be extra careful to avoid further damage.
Clearing Surrounding Area
Before you begin, clear away dust, debris, or any obstacles around the screw. Even small particles can interfere with your tools. A clean workspace means better grip and visibility.
If the screw is stuck in a painted surface, scrape away loose paint around the area to expose the screw fully. You can use a utility knife or a small flathead screwdriver for this.
Do you have access to the screw from all angles? If not, reposition your material or workspace to ensure you can work comfortably. This will make the removal process smoother.
Preparation is key to success here. The better you assess and clear the area, the less likely you are to cause further damage—and the more likely you’ll remove that stubborn screw with ease.
Credit: m.youtube.com
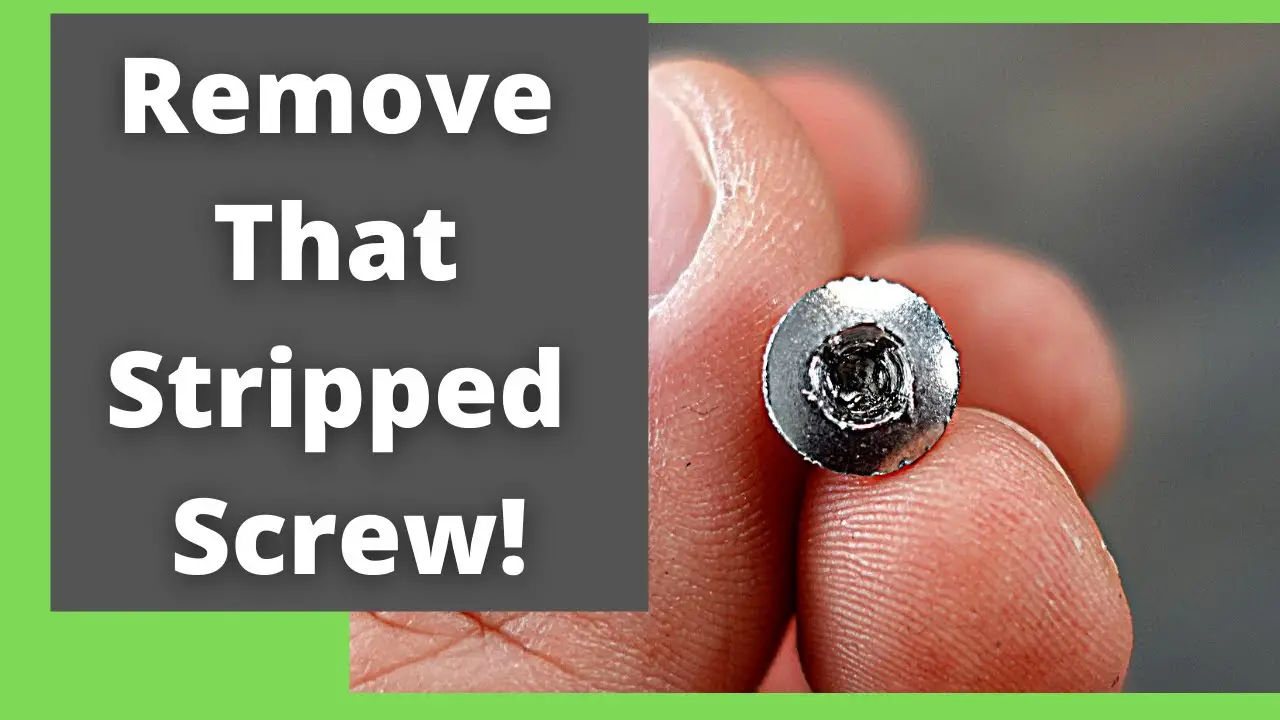
Related Article: How to Remove Broken Screw: Quick & Easy Fixes!
Techniques For Easy Removal
Dealing with a broken screw can be frustrating. It requires patience and the right techniques. Some methods can make the process easier and save time. Below are simple and effective ways to remove broken screws without damaging the surface.
Using Rubber Bands For Grip
A rubber band can help gain extra grip on a stripped screw. Place the rubber band flat over the screw head. Then, use a screwdriver to press firmly into the rubber band. Turn the screwdriver slowly to loosen the screw. The rubber band fills gaps in the screw head, creating friction. This method works well for slightly stripped screws.
Reverse Drilling Method
The reverse drilling method is useful for removing stubborn screws. Use a drill with a reverse or counterclockwise setting. Attach a drill bit slightly smaller than the screw head. Position the drill bit at the center of the screw. Apply steady pressure as you drill in reverse. The screw should gradually loosen and come out. This technique works best for deeply embedded screws.
Advanced Methods For Stubborn Screws
Sometimes, dealing with a broken screw can feel like an impossible task. You’ve tried the basics, but the screw just won’t budge. That’s when advanced methods come into play, giving you the tools you need to tackle even the most stubborn screws. Let’s dive into some proven techniques you can use to get the job done without damaging your project or wasting hours.
Heat Application Tricks
Heat can be a game-changer when a screw refuses to turn. Metal expands when heated, which can loosen the grip of the screw threads. A simple tool like a hairdryer, heat gun, or even a lighter can do the job.
Start by applying heat directly to the screw for about 20-30 seconds. Be careful not to overheat and damage the surrounding material. Once heated, immediately try to unscrew it using your screwdriver or pliers. Did it move even slightly? That’s your cue to keep going!
If you’re working with heat-sensitive materials like plastic or wood, shield the area with aluminum foil to avoid unnecessary damage. Always wear gloves to protect your hands from burns. Have you thought about how much easier this is than brute force?
Chemical Lubricants
When heat isn’t an option, chemical lubricants can save the day. These solutions penetrate deep into the threads, reducing friction and making it easier to twist the screw out. WD-40 is a household favorite, but any penetrating oil can work wonders.
Spray or apply the lubricant directly onto the base of the screw. Let it sit for 10-15 minutes to soak in—patience is key here. Then, try unscrewing it using steady, firm pressure. If it doesn’t budge at first, reapply the lubricant and give it another shot.
If you’re worried about making a mess, place an old rag or paper towel under the area to catch any drips. And don’t forget to clean up the residue afterward. Does this method seem like a small effort for such a big payoff?
Advanced methods like these can make all the difference when dealing with stubborn screws. Whether it’s the strategic use of heat or the magic of lubricants, the right technique can save you time and frustration. Which one will you try first?
Credit: tocgrp.com
Safety Measures During Removal
Removing a broken screw can be frustrating, but rushing the process can lead to accidents or even more damage. Prioritizing safety is crucial to protect yourself and ensure the task is done correctly. By taking simple precautions, you can avoid injuries and tackle the problem effectively.
Protective Gear Importance
When removing a broken screw, sharp edges and flying debris can pose serious risks. Always wear protective gloves to shield your hands from cuts and scrapes. Safety goggles are equally essential to protect your eyes, especially if you’re using tools like drills or pliers.
Dust masks can be helpful if you’re working on wood or metal that might release particles during removal. Never underestimate the importance of sturdy footwear to protect your feet from falling tools or materials. It might seem like overkill, but better safe than sorry!
Avoiding Further Damage
Applying too much force can worsen the situation, breaking the screw further or damaging the surrounding material. Use gentle pressure and the correct tools, like a screw extractor or pliers, to avoid slipping or digging deeper into the surface.
If you’re working on delicate materials like wood or plastic, consider adding a piece of masking tape over the area. This can prevent scratches and keep the surface intact. Have you ever regretted rushing a repair job? Take your time—it’s worth the extra patience!
Remember to inspect the screw and surrounding area before starting. Understanding the situation can help you choose the right method and tool. A little prep work can save you hours of frustration later.
Tips For Preventing Future Breakage
Broken screws can be frustrating, but there’s good news—you can prevent it from happening again with a few simple adjustments. By choosing the right materials and using proper techniques, you’ll save time, effort, and headaches in the long run. Let’s dive into how you can make your screw-related tasks more durable and stress-free.
Choosing Quality Screws
Not all screws are created equal. Cheap screws might seem like a good deal at first, but they’re often made of low-quality metals that snap under pressure. Invest in screws made from stainless steel or other durable materials—they’re built to last and resist corrosion.
Check the screw size and type for your project. Using the wrong screw can put unnecessary stress on it, leading to breakage. For example, drywall screws aren’t ideal for heavy-duty woodwork, so match the screw to the job at hand.
Also, inspect the screws before use. If you notice any visible defects like bent shafts or damaged threads, don’t risk using them. A single flawed screw can compromise the integrity of your entire project.
Proper Installation Techniques
Over-tightening screws is one of the main causes of breakage. Stop tightening as soon as the screw feels secure. Going further can strip the threads or snap the screw head off.
Use the right tools for the job. A manual screwdriver gives you more control, but for faster work, a power drill with adjustable torque settings is a great option. Set the drill to a lower torque to prevent over-tightening.
Pre-drilling pilot holes can make a world of difference. A pilot hole gives the screw a clear path, reducing stress on the material and the screw itself. If you’ve ever heard a loud cracking sound while driving a screw, it’s likely because you skipped this step.
Finally, work at a steady pace. Rushing can cause the screw to go in at an angle, which weakens its hold and increases the risk of breakage. Take your time to ensure each screw goes in straight and evenly.
What small adjustments can you make today to keep your screws intact for years to come? Try these tips, and you’ll be surprised how much smoother your DIY projects become.
:strip_icc()/BHG-home-improvement-advice-expert-advice-how-to-remove-stripped-screw-hero-4e5488246e9d4240ba33c56d02f6b41d.jpg)
Credit: www.bhg.com
When To Seek Professional Help
Removing a broken screw can be frustrating and time-consuming. In some cases, the situation may be too complex to handle alone. Knowing when to seek professional help is important. Experts have tools and experience to safely remove the screw. Below, we’ll discuss signs of complex cases and the benefits of expert assistance.
Signs Of Complex Situations
Some broken screws are more challenging to remove than others. A screw deeply embedded in a hard material may require professional tools. If the screw head is entirely stripped or broken off, it can make removal nearly impossible without expertise. Rusted or corroded screws often require special techniques to avoid damaging surrounding materials. Additionally, screws stuck in delicate or expensive items, like electronics or furniture, need careful handling.
Benefits Of Expert Assistance
Professionals have specialized tools designed for tough screw removal. This includes extractors, drills, and lubricants that are not commonly available at home. They know how to remove the screw without damaging surrounding materials. Experts can save you time by solving the problem quickly. Their experience ensures the task is completed efficiently and without further complications. Hiring a professional can also prevent costly mistakes or accidents during the process.
Conclusion
Removing a broken screw doesn’t have to feel overwhelming. With the right tools and a steady approach, you can fix the issue quickly. Always choose the method that suits your screw type and material. Take your time to avoid causing further damage.
Practice patience and precision for better results. Keep basic tools handy for future fixes. Regular maintenance can prevent screws from breaking again. Now you’re ready to handle this common issue with confidence. Simple steps can save time and effort.

You May Also Like
Best Paper Cutters for Precise, Durable, and Easy Crafting Cuts
Best Extension Cords for Home, Office, and Outdoor Power Needs